

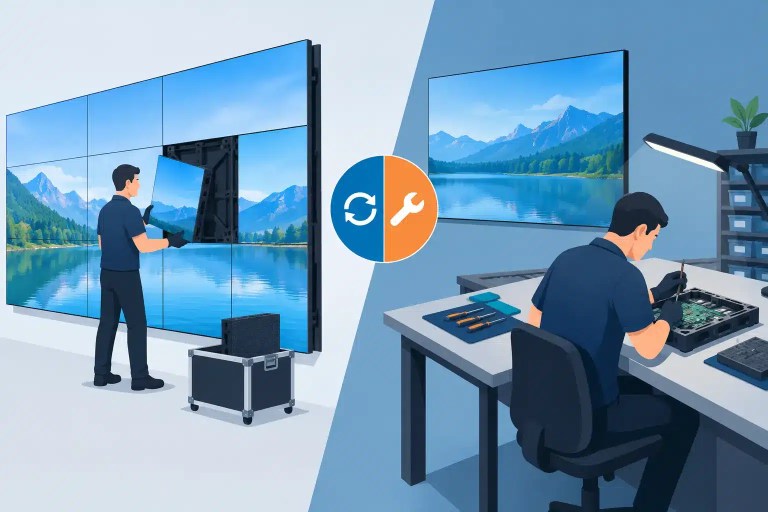
A wall can look wrong for two very different reasons. It may need calibration to bring brightness, color, and grayscale back into alignment. Or it may have a physical fault that is creating dead pixels, unstable color, scan lines, intermittent sections, or a module that fails under load. Understanding calibration vs hardware repair matters because applying the wrong fix wastes valuable time and can leave a professional LED system unreliable for the next show, deployment, or client presentation.
For AV rental companies, integrators, venues, and production teams, the decision is not academic. A calibration adjustment can improve a healthy display quickly. It cannot repair a damaged LED, failed driver IC, lifted PCB pad, weak connector, or processor issue. Proper diagnosis separates a display that needs tuning from one that needs technical repair.
What Calibration Actually Corrects
Calibration is the process of measuring and adjusting how an LED display produces an image. Depending on the system and available control platform, it can address brightness uniformity, white balance, color temperature, grayscale behavior, gamma response, and module-to-module visual consistency.
A properly calibrated wall should present a more consistent image across the full canvas. On a large indoor video wall, that may mean eliminating visible brightness differences between cabinets. On rental inventory, it may mean matching replacement modules to an existing batch closely enough that they do not stand out on camera or during dark content.
Calibration is especially useful after normal aging, when different sections of a display have accumulated different operating hours, or after a properly matched module replacement. It can also help correct settings-related issues caused by an incorrect receiving-card configuration, a mismatched color profile, or poor brightness setup.
The key limitation is simple: calibration changes operating values. It does not restore failed physical components.
If an individual red LED is open, no color profile can make it emit red. If a driver IC is failing intermittently, brightness adjustments may make the symptom appear less obvious at one level while the actual fault continues to develop. If a module has moisture damage, damaged traces, or a compromised connector, recalibration is not a repair strategy.
When an LED Wall Needs Hardware Repair
Hardware repair is required when the display has a component, connection, power, signal, or board-level defect. These failures can be obvious, such as a black module or a cluster of dead pixels. They can also be intermittent and frustrating: a section that shifts color after warming up, a horizontal line that appears only on dark content, or a cabinet that drops out during a show despite passing a quick bench check.
At the professional level, repair begins with determining where the failure actually originates. A visible pixel issue may come from the LED package itself, its solder joint, a driver IC output, a damaged trace, a row or column circuit, a data connection, or a configuration issue upstream. Replacing a module without identifying the root cause can be appropriate in some emergency situations, but it is not always the most practical or reliable answer.
Component-level repair can include precision LED replacement, driver IC replacement, PCB trace repair, connector repair, rework of failed solder joints, and correction of damage from prior repair attempts. It may also involve troubleshooting receiving cards, hub boards, power distribution, controller settings, or processors when a problem affects more than one module.
This is where the difference between basic parts swapping and technical repair becomes clear. A module that is visually defective may be repairable. A module that has already been replaced twice may point to an upstream power or data problem. A processor suspected of failure may instead have an output mapping, firmware, or configuration issue. The correct scope of work depends on evidence, not assumptions.
Calibration vs Hardware Repair: How to Tell the Difference
The first question is whether the issue is consistent and image-wide or localized and physical. Broad, uniform color differences across a wall often suggest calibration, processing, or configuration. A single dark pixel, a repeating line, a flickering cluster, or an entire dead module more often points toward a hardware fault.
That said, real failures do not always follow clean rules. A receiving-card issue can create what looks like a module failure. A marginal driver IC can produce color inconsistency that resembles calibration drift. A poorly matched replacement module may be electrically healthy but visually wrong because its brightness and color characteristics do not match the installed inventory.
A practical diagnostic process should consider the symptom, its location, when it occurs, and whether it changes with content, brightness, temperature, movement, or cabinet position. For example, a color shift that remains in the same physical module after swapping signal paths strongly supports a module-level issue. If the problem follows the signal output instead, the investigation needs to move upstream.
Signs Calibration May Be the Right Path
Calibration is a strong first consideration when the wall is operating consistently but looks uneven across larger areas. Typical examples include a display that appears too cool or too warm, cabinets with minor but uniform brightness variation, grayscale that looks compressed, or replacement modules that function correctly but need visual matching.
It is also appropriate after verified hardware repairs. Once repaired modules are electrically stable and pass functional testing, calibration can help integrate them into the overall display image. Repair restores functionality. Calibration helps restore presentation quality.
Signs Hardware Repair Is More Likely
Hardware repair should move to the front of the line when the display has dead or stuck pixels, recurring flicker, missing rows or columns, localized discoloration, black areas, physical damage, or faults that come and go with movement or heat. These symptoms require inspection and testing rather than image adjustment.
The same applies when a problem returns after a previous repair. Recurrence may indicate that the original fault was not fully addressed, the wrong component was replaced, or the module was repaired without resolving related damage. On high-use rental panels, rushed field fixes and repeated handling can create issues that only become clear under controlled testing.
Why Misdiagnosis Costs More Than a Repair
A calibration pass performed on a damaged module can delay the real repair and put unreliable inventory back into service. The cost is not limited to the module. It can include technician time, prep delays, shipping, emergency replacements, reduced rental availability, and a visible failure in front of a client or audience.
The opposite mistake also happens. Teams may send healthy modules for repair when the actual issue is mapping, cabinet data routing, processor configuration, or calibration. That is why a credible technical partner does not begin by treating every image defect as a broken module.
For professional operators, documentation matters here. A useful repair process records the reported symptom, diagnostic findings, work performed, replaced components where applicable, and final QC results. This creates accountability and helps inventory managers identify patterns across a batch, a specific product line, or a recurring deployment environment.
725Co. approaches LED failures with that distinction in mind: diagnose first, perform component-level repair when the evidence supports it, and verify the result through documented quality control. That process is designed for teams that need reliable inventory, not a temporary visual improvement.
The Role of Testing Before and After Repair
A repaired module should not be judged only by whether it powers on. Professional QC requires testing for pixel function, color response, brightness stability, scan behavior, data integrity, and defects that emerge during runtime. Depending on the failure, testing may also need to confirm behavior at different brightness levels and after the module has had time to warm up.
This is particularly important with intermittent faults. A module can appear normal for a few minutes and fail after thermal expansion exposes a weak solder joint or marginal component. Returning that module to a rental fleet without adequate testing simply transfers the risk to the next job.
Calibration may be part of final acceptance when visual matching is required, but it should follow repair and functional verification. It cannot serve as proof that a board-level repair is reliable.
Making the Right Call for Your Inventory
Not every defect justifies the same response. If a wall is healthy but visually inconsistent, calibration may be the efficient and appropriate solution. If a display has localized or recurring faults, component-level diagnostics may preserve valuable modules and avoid unnecessary replacement. If the system is older, discontinued, or difficult to source, repair can be especially valuable when replacement stock is limited or financially impractical.
The operational question is not simply whether calibration or repair costs less. It is which path returns the asset to a reliable, presentable condition with the least risk to uptime. For equipment that supports live events, fixed installations, and high-visibility presentations, that answer should be based on a real diagnosis, not the fastest available guess.

Jose de Jesus Martinez (Chuy) is the CEO of 725co. LED Repair Professionals, a trusted name in high-quality LED module repair and video wall services. With over 12 years of experience and certification as an electronic engineer, Chuy has built a reputation for excellence, partnering with industry leaders. Under his leadership, 725co is known for precision repairs, transparent service, and a commitment to protecting the long-term value of LED investments.

2 Responses